Yoga For Back Pain I
Yoga for Back Pain

There are enough studies that reported Yoga may be one of the most effective ways to overcome back pain. Yoga may be an effective way to reduce the pain of back problems, however knowing exactly what poses to choose and how systematically and correctly to use are the factors that should be considered first before using it as a therapeutic relief for back pain. I heard many people say “….if I have to go through all that stuff, then I would better take some painkillers and call it a day.” If that is the case, I’m not scaring you away from ‘Yoga for back pain’ workouts, rather encourage you to use yoga as an alternative to drugs for your problems. However, to get a winning edge with its use, a proper awareness of the yoga for back pain methods and a consultation with a qualified instructor is all that is required for a lasting use of this drug-free alternative.
If you are self practicing, please do research thoroughly to understand each asana before starting doing them. I’m listing here some effective minimal asanas which are proven by yogis over the ages that can curb back pain complaints in the long run. I’ll try my best to provide you with clear instructions as simple as possible on each pose mentioned here. If needed search for videos from experts for the listed asanas and learn each one at a given period of intervals until you master it. Once you learn and become confident about every pose, put it in a systematic order and practice regularly according to your conscience and knowledge. There is always ample space for innovation and creativity in yoga without deviating from the core rules.
Make sure to choose a comfortable ambience and accessories using a comfortable attire. Using related brainwave music could be an added advantage on supplementing the relief process.
The asanas specially mentioned here for handling the back pain issues are (1) Sarvangasana, (2) Setu Bandhasana, (3) Matsyasana, (4) Vatayanasana, (5) Halasana, (6) Paschimottanasana, (7) Purvottanasana, (8) Dhanurasana, (9) Chakrasana, (10) Ardha Matsyendrasana, and (11) Savasana.
Sarvangasana
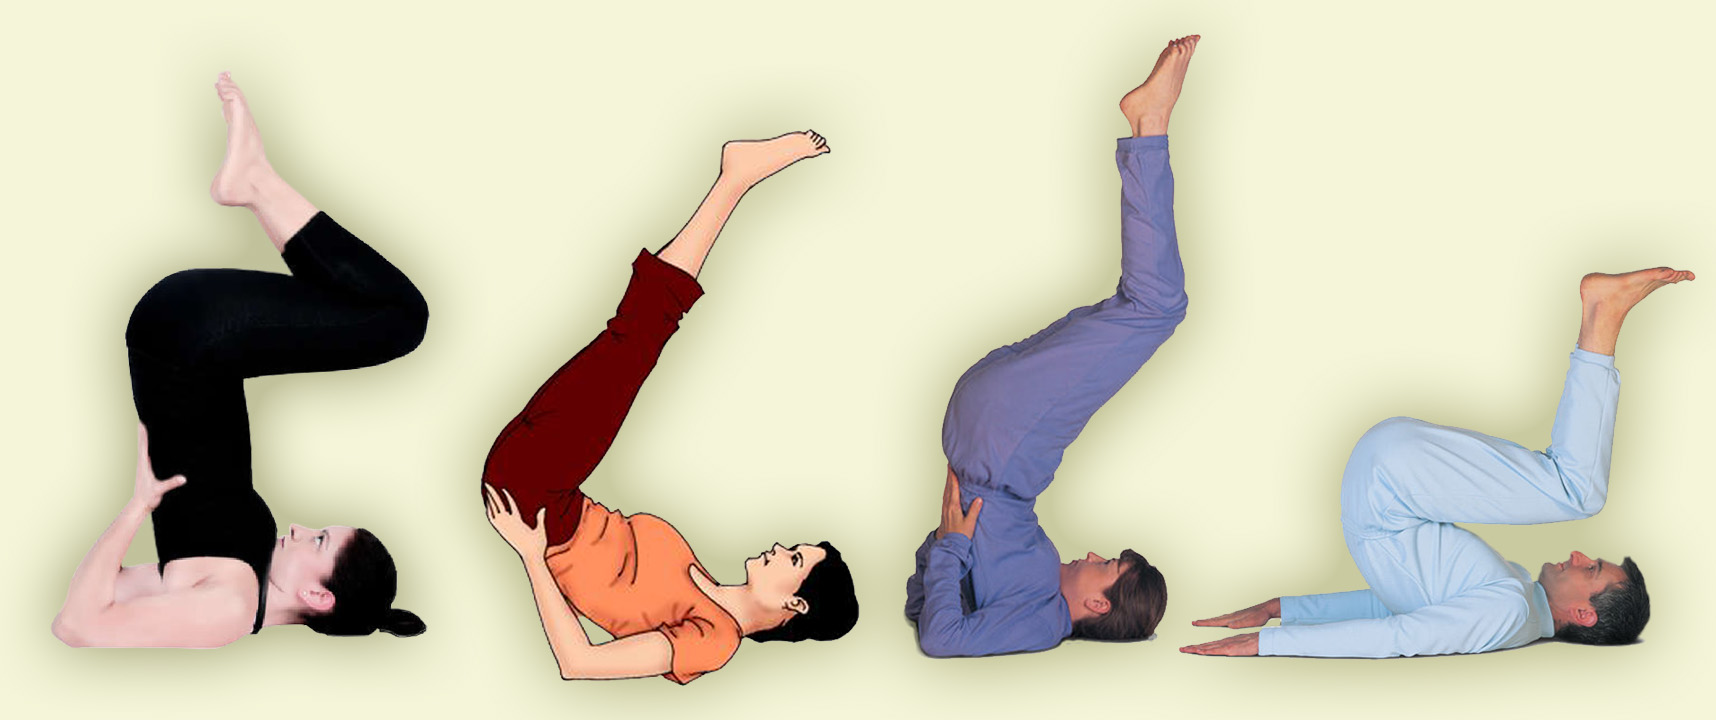
Sarvangasana means asana for the entire body. Don’t do it straight away in the beginning. Initially you can start with any variant of half posture of the same asana (Ardha-Sarvangasana) as shown in the picture (any one out of the four variants) for at least a couple of weeks. Timing and procedures are the same as the original asana, which is explained here as you read down. Once you are comfortable with this, then move on to full, Sarvangasana.
Doing:
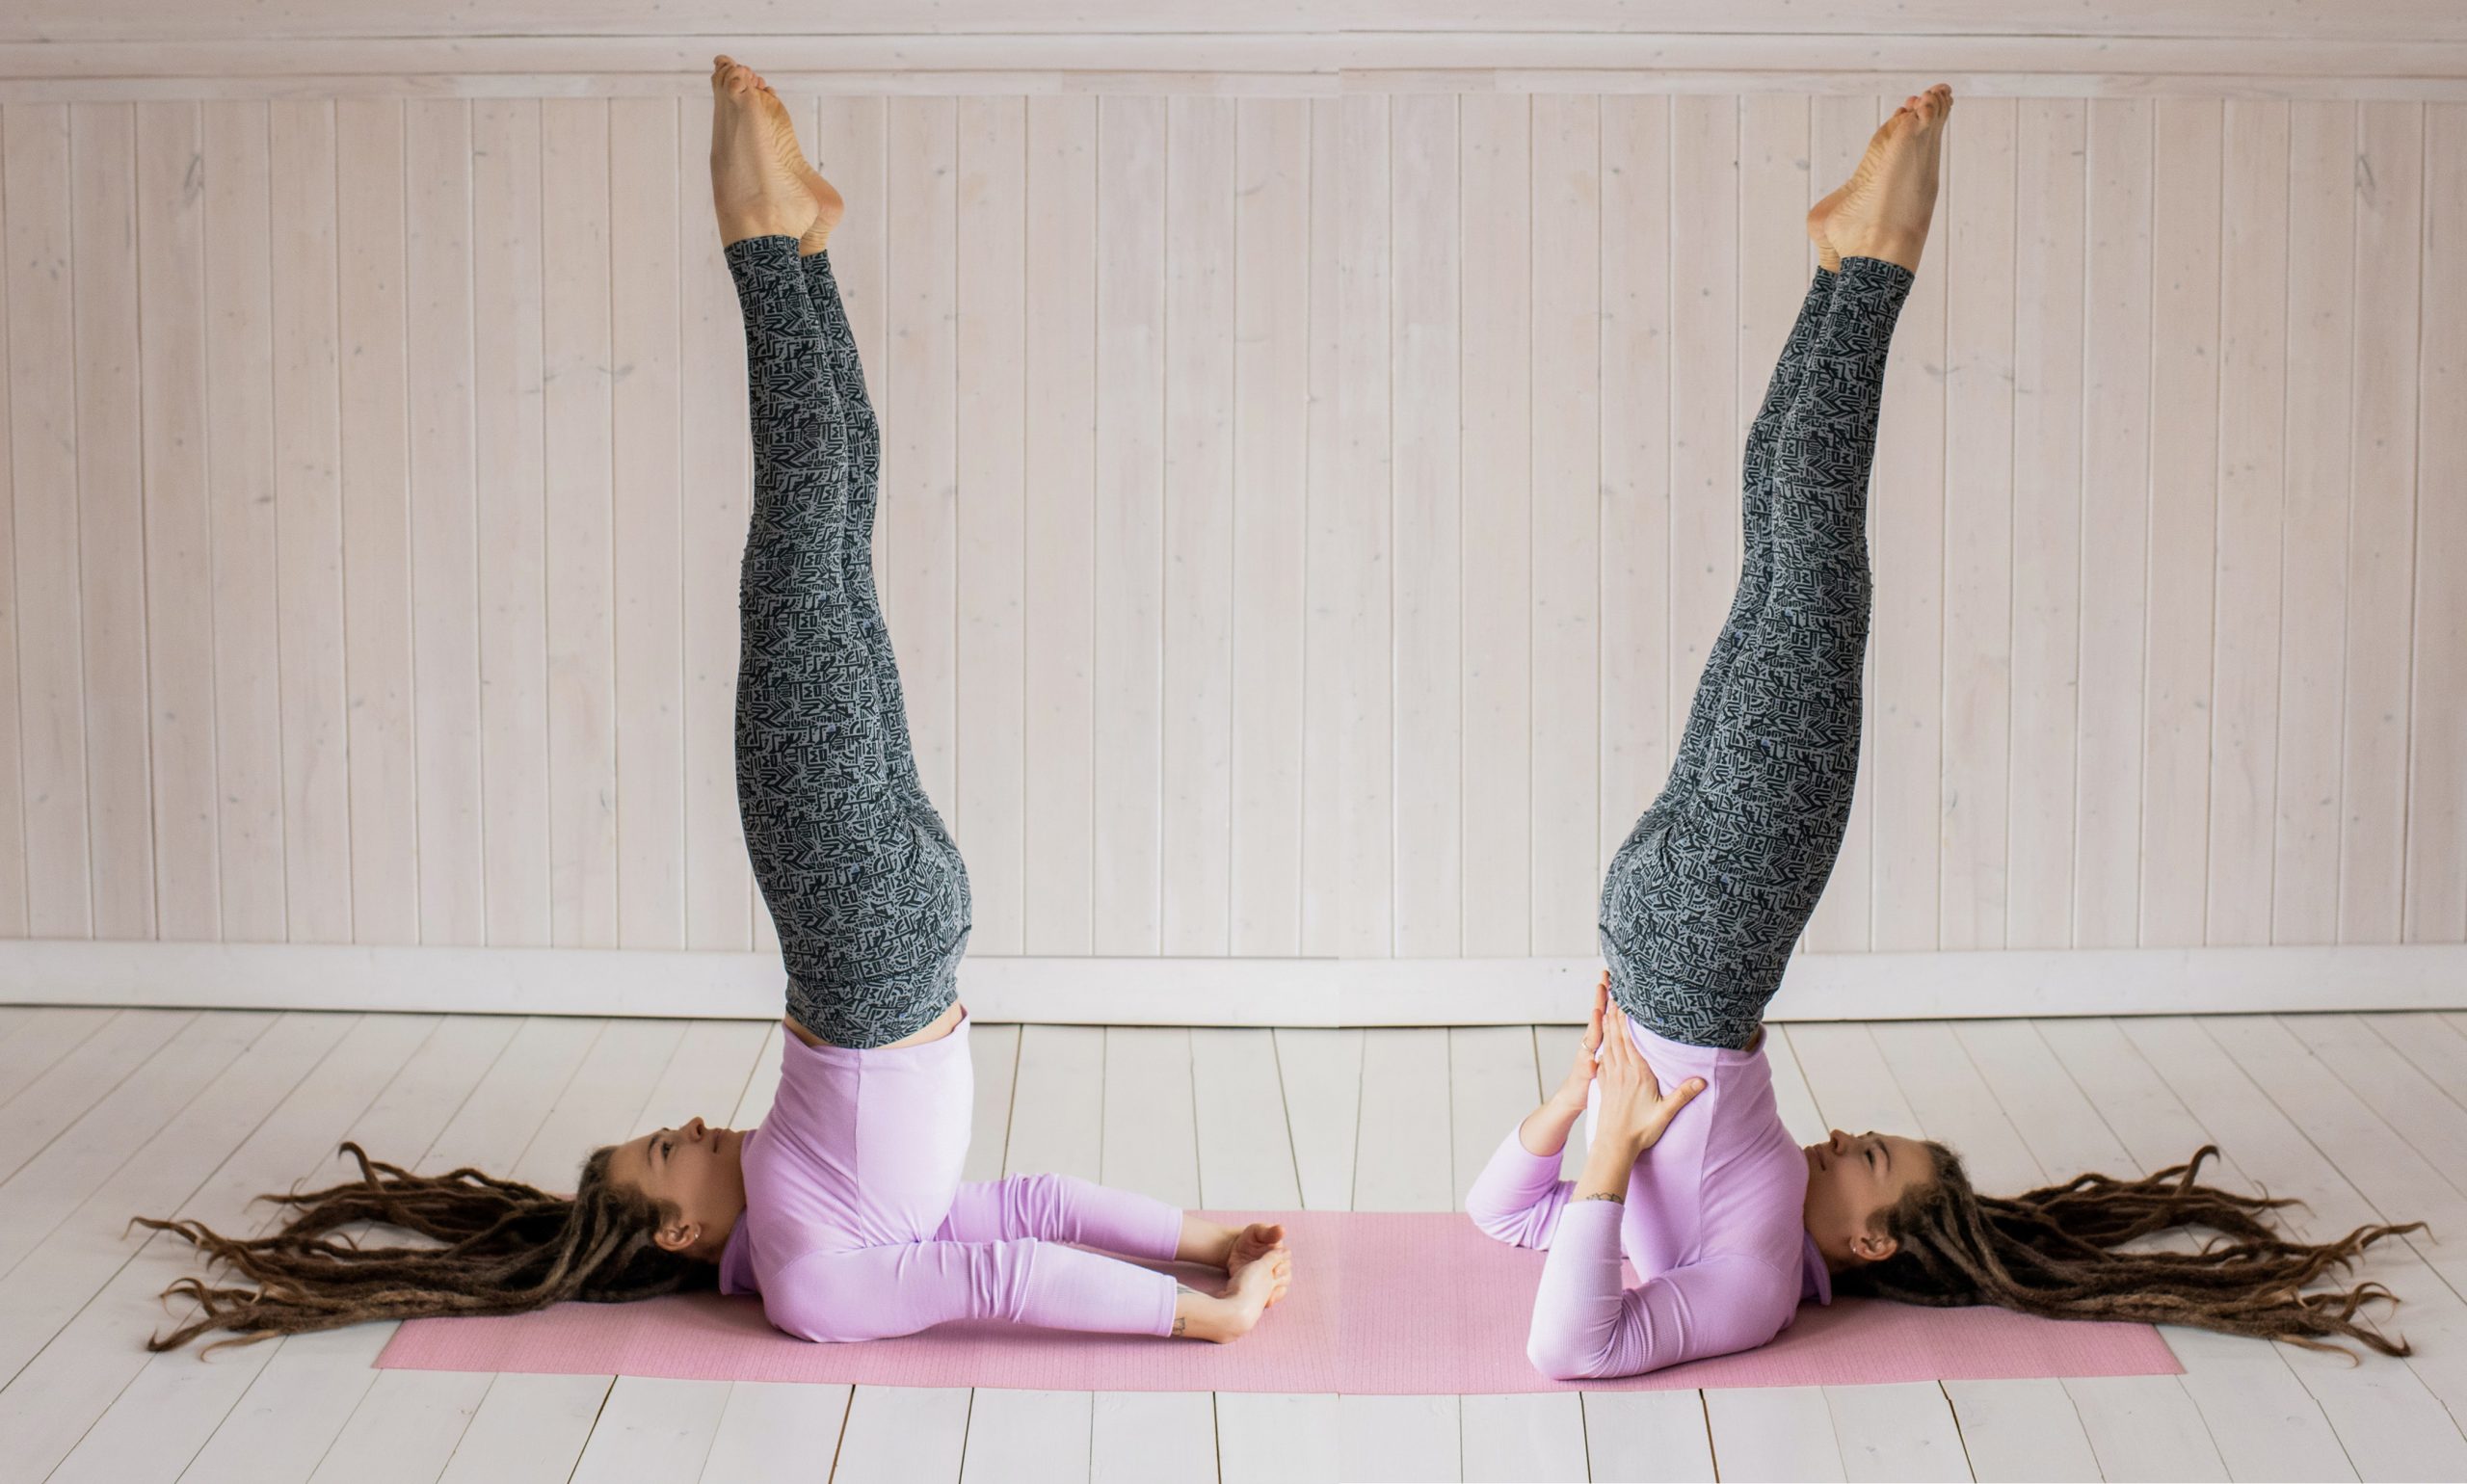
Lay down straight on your back on a comfortable soft surface (eg. rubber-mat). Place your hands on either side, aligned with legs, with palms touching the ground. Without bending the legs, lift your legs while exhaling and move your body beyond the head, till your chin touches your chest, within 4 seconds. Stay in this position for a minimum of 30 seconds to a maximum of 3 minutes. Put it another way, starting with, stay for 5 to 10 breathing cycles initially and then to a maximum of 60 breathing cycles. Breathe normally, if possible slowly and focusing on it. Whale coming down to starting position, inhale, bend the knees and lower your hips still supported by hands and then release hands all in 4 seconds. You can do either of the variants shown in the picture below. If you feel overwhelmed by the varieties of the yoga asanas and procedure, this one asana can fill all those gaps if you do this consistently without skipping, just like a ‘one pill for all cure’.
Benefits – Warnings:
Other than the spinal health and back pain relief, Sarvangasana helps in reducing excess weight. Strengthens legs, knees, waist, neck and shoulders. Improves blood circulation and cures skin diseases. Removes bad odor from the body cures acidity, digestive problems, diabetes. Eye sight problems, insomnia, Piles, spondylitis and tonsillitis.
Persons with Hyper-tension, heart ailments, respiratory problems, pregnancy, high myopia, glaucoma and retinal detachment. Don’t do this asana immediately after any high workouts or gymnastics as the pumping of more blood to the brain will do more harm than any good.
There must be a follow up pose after sarvangasana, after lying in savasana for 1 to 2 minutes, such as Setu Bandhasana (Bridge pose) and Matsyasana (Fish pose), in which Matsyasana is more important.
Setu Bandhasana
Doing:
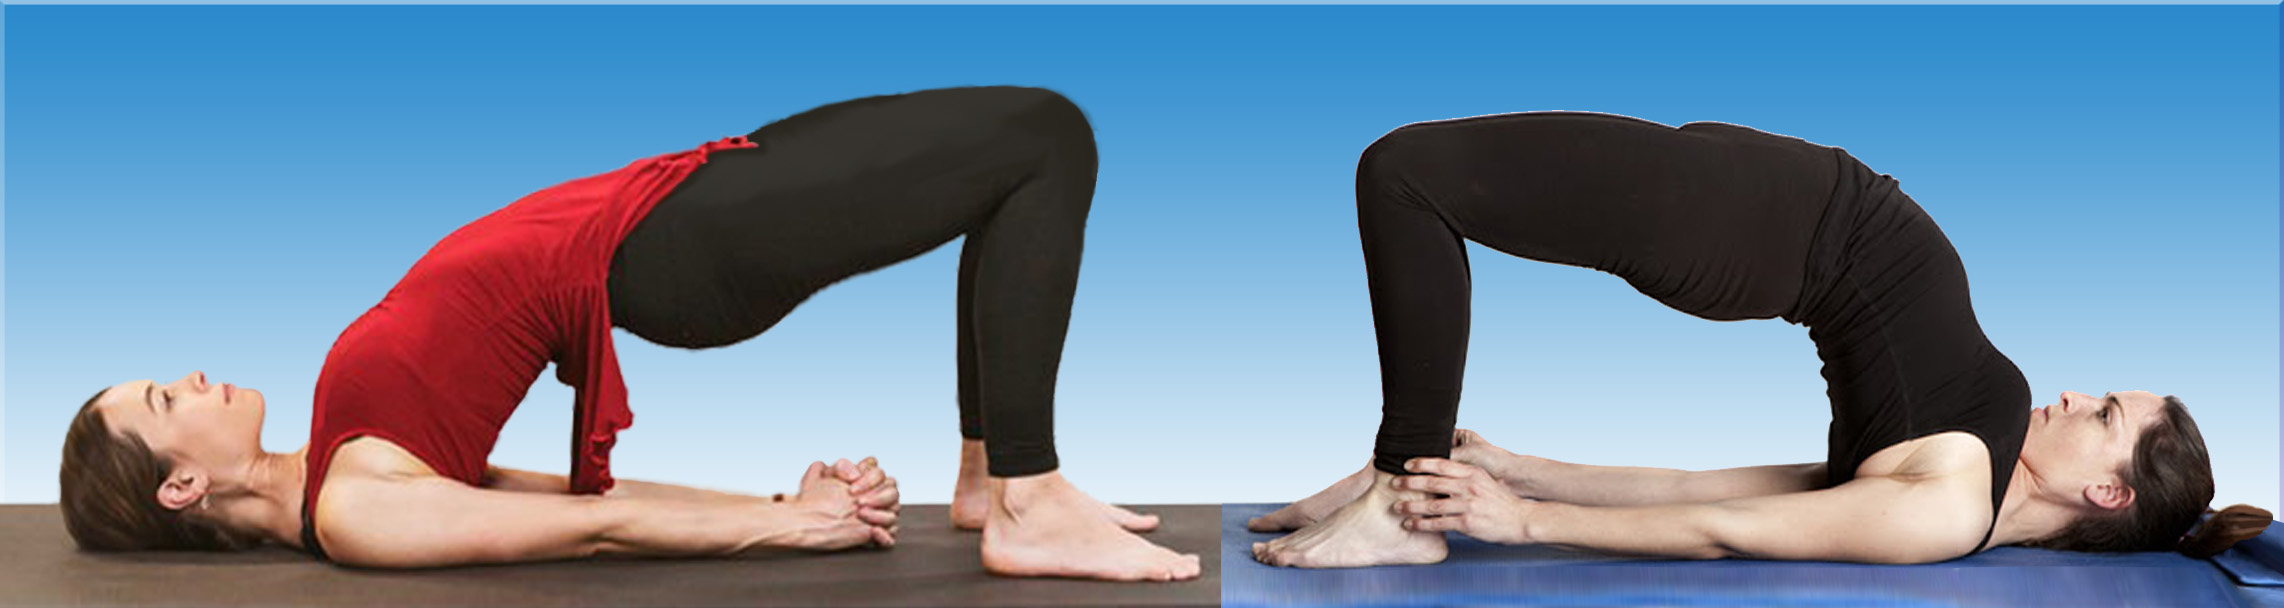
To begin with, lie on your back, and fold your knees. ➤Keep your feet hip-width apart on the floor, one foot away from the hip, with knees and ankles in a straight line perpendicular to ground, and arms straight beside your body, palms facing down. ➤As you inhale, slowly lift your lower back, middle back and upper back off the floor and gently drag in your shoulders until your chin touches the chest without bringing the chin down, supporting your body weight with your shoulders, arms and feet. ➤If you find it difficult, you could support your back with your palms. ➤Or you could interlace your fingers and push the hands on the floor to lift the torso a little more up, or you could hold angles as a variant pose. Breath normally at ease. ➤Hold for two minutes and exhale as you slowly release the pose.
Benefits – Warnings:
Along with strengthening the back muscles, it also relieves the tiredness in the back instantaneously. Setu Bandhasana gives you a good relaxation to the chest, neck and spine. This can reduce anxiety, stress and depression and calm your brain as well. This asana help in reducing many other ailments such as lung disorders, thyroid problems, indigestion, the symptoms of menopause and menstrual pain, asthma, high blood pressure, osteoporosis, and sinusitis.
Don’t do this pose if you are suffering from neck or back injuries.
Matsyasana
Doing:
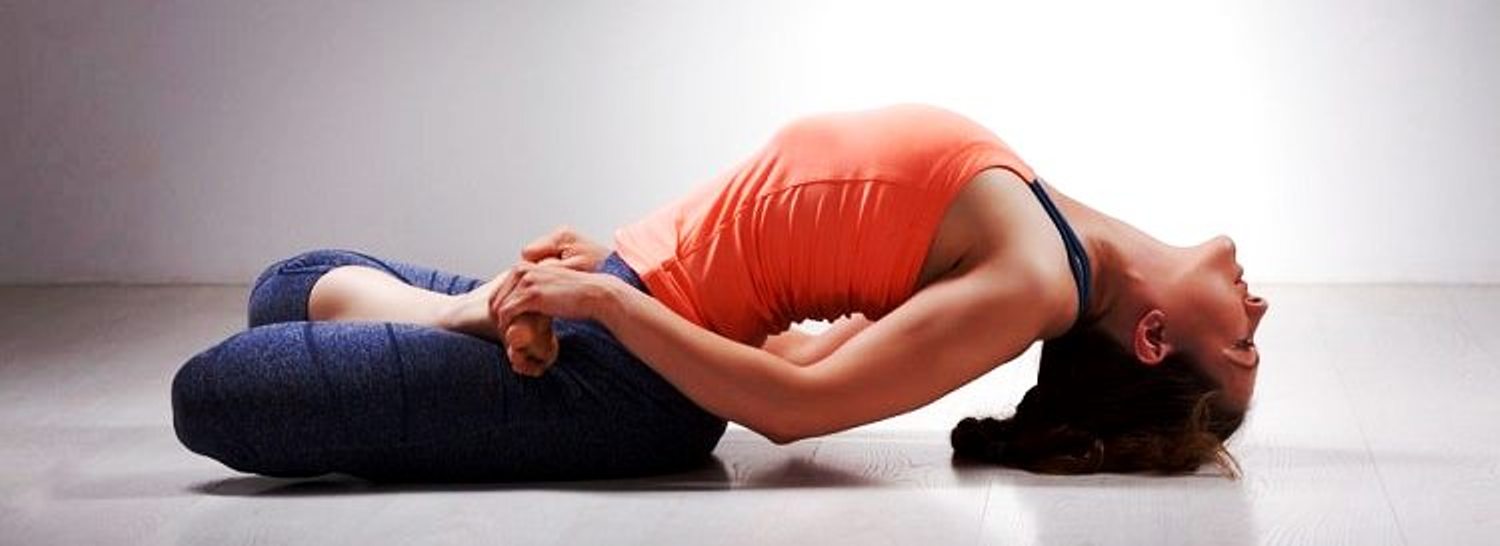
Sit on the Padmasana, slowly move your trunk backwards until the hand rests on the ground. Keeping the hands on either side of your body. Lift your trunk to arc the spine so that the entire body is balanced on head and hips. Hold it right toe with your left hand and left toe with the right hand. Stay in this position for a comfortable duration. Inhale normally and exhale little forcefully like blowing. This should be done for at least one third of the time you took for Sarvangasana. Eg., if you took 60 breath cycles for staying in Sarvangasana, then stay for 20 cycles in Matsyasana. This is a must follow up pose you must do after doing Sarvangasana followed by the rest (savasana). It is customary that at the end of every asana, taking rest in savasana is followed.
Benefits – Warnings:
Matsyasana, not only helps reduce back pain, but also nourishes eyes, reduces eye strain, and improves vision. The spinal cord becomes flexible. It expands the chest and lungs, which helps in curing lungs related problems. It improves the skin glow and enhances beauty. Cures bronchitis, digestive problems, depression, diabetes, skin diseases, and tonsillitis.
Precautions: People suffering from sciatica pain, Hernia, pain over the lower part of spinal column should not practice this until their disturbing symptoms are subsidised either through medication or through practising other asanas.
‘Yoga For Back Pain’ To Be Continued..
Because of the space and reading constrains, the remaining asanas in this series [(4) Vatayanasan, (5) Halasana, (6) Paschimottanasana, (7) Purvottanasana, (8) Dhanurasana, (9) Chakrasana, (10) Ardha Matsyendrasana, and (11) Savasana] will be discussed in the following article next week. [CONTINUE HERE]



Yoga For Back Pain I Read More »